
Painting Small Figures
Published : 10/18/2014 09:44:14
Categories : Articles
Introduction
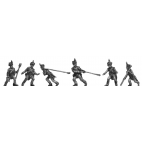
For what it’s worth, here are my ideas on painting small figures. Since I started making figures professionally back in about 1984, I tried to paint one of every figure in my catalogue, and keep them in special display cases. Many of the ones in our AB catalogue pics were done twenty years ago. I am somewhat behind at present, so I’m having a painting session right now, but frankly I can’t really paint like that anymore: age has now caught up with me!

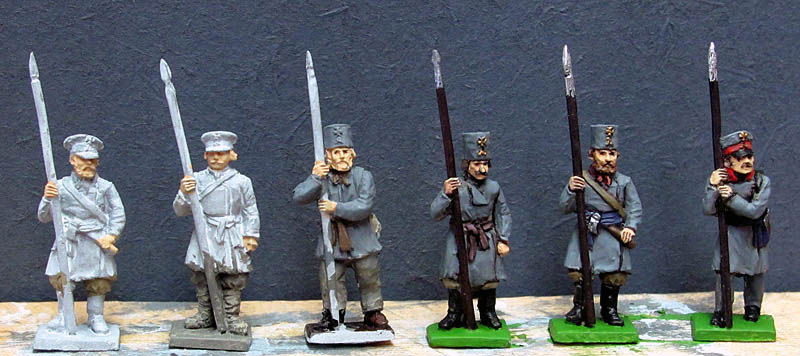
My painting techniques are obviously intended for display figures, though when I made wargame armies back in the 80s and 90s I used essentially the same method. It’s not quick, but then no quality painting technique can be. It requires time and concentration. Stick each batch of figures (perhaps ten or twelve in a row) to a wooden stick, using superglue, then prime them with Humbrol enamel matt white.
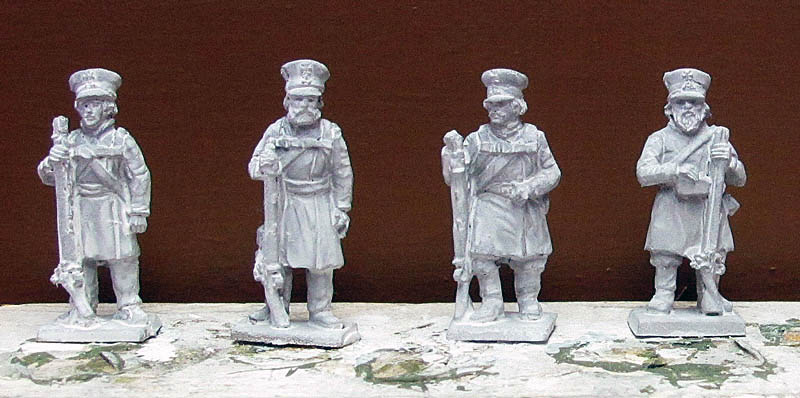
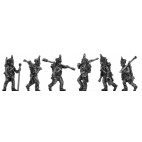
It covers metal much better than water-based acrylics. I have never liked black undercoat. No canvas painter works over a black ground, since it makes twice as much work. Small figures need all the help they can get to jump out at you. The painting needs to be unrealistically bright to work well in small scale, and there is also the Scale Distance effect, which makes colours appear lighter the farther away they are. Small figures are visually a long way away. Vehicle modellers have long known about it, but figure painters should be aware too. Black undercoating just muddies the picture, killing any luminosity in the lighter colours, and in order to get them to look bright on top of it, you have to add them very thick. I realise it’s one shortcut to lining out the various parts, but I think it produces a very coarse effect. It seems to be one of those modelmaking fads, like drybrushing, which is another unrealistic abomination. I block in the colours over the white, and where possible avoid getting paint on items like belts, that are going to be white when finished. Precision at this stage saves time repairing errors later: take care, paint only what needs to be painted.

Once all the basic colours are on, including a pale flesh for face and hands, I take a fine 0-size brush with a fine trailing point. Test it first: it must be able to make a really fine line reliably. It will probably have a little hook at the end. Treasure it. Using a quite wet red-brown mix of Gloss Black and Transparent Red, or Gloss Dark Brown and red for a more gentle contrast, put a fine line between each element. On a white-coated figure I might use a warm grey instead. This lining gives the whole articulation to the figure and makes it come alive. The light red brown is also used to pick out hair and facial details (all my figures tend to have red-brown hair!). Finally, the tiniest spot of gloss black for the eyes.


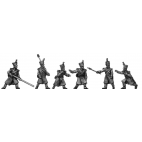
There is always quite a lot of tidying up at the end, sharpening edges, and a little highlighting, which can take quite as long as blocking in all the colours.

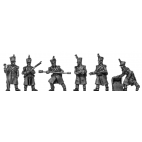
Horses are best done using artists’ tube acrylics over an ordinary basecoat. You will save time by painting horses completely without riders, then adding and gluing on riders after dashing some dark colour onto their bottom edges. Light red (chestnut), Burnt Siena (bay), Burnt Umber (dark bay) etc., over a brown base colour to improve opacity, since tube acrylics have a tendency not to cover, though the tints are perfect. For black horses, use a satin black with some Burnt Siena or red in it. I undercoat in white enamel, then put on a thin wash of light brown/red. When dry, brush Burnt Siena over it using a big brush.

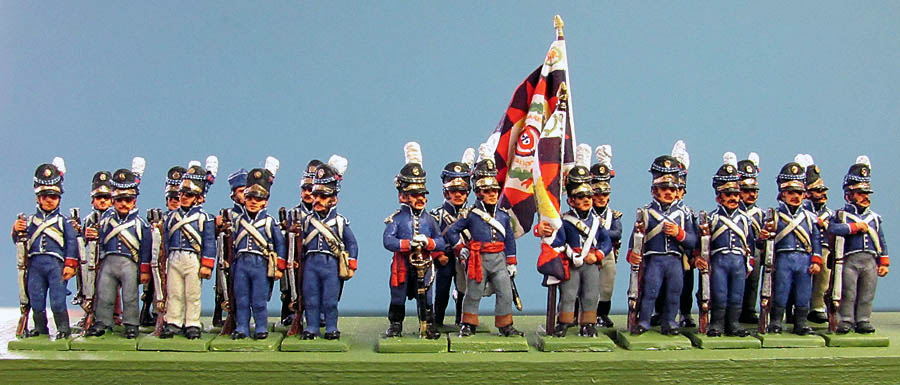
Before it dries, you can blend in a darker colour for the lower legs, and pick out the mane and tail. Grey horses are very variable, and many have dark legs and mane. Hooves for all colours are generally grey. Harness was black for all except British, who used dark brown. Paints & colours: The Vallejo range is fantastic, and they deserve all the success they have had. The range provides almost everything you can think of, in a handy and long-lasting bottle. Humbrol and Revell acrylics are fine , though the colour range is less useful. There are other ranges made by wargames manufacturers, but a brief acquaintance suggests they are no better, and some of them are distinctly thin on pigment. If you can find them, Pelikan Plaka casein paints are wonderful: very opaque, very flat. They used to be very commonin shops, but now rather overshadowed by acrylic. The Plaka blues and yellows are really good, and you can buy them online. I always used both gloss and matt black, for instance on shakos, to distinguish between the felt parts and the leather parts. Gloss acrylic can be very good, and you can reduce the shine to satin by mixing in a little matt. Austrian white uniforms should be a pearl grey, with the belts done in white mixed with a dab of yellow ochre: that give two different “whites“, one greyish, one yellowish, which helps separate them visually. Originally, I mostly used Rose gold powder in oil for the brass/gilt items, but the recent acrylic metallics can be quite as good, and less fuss to use. Bare steel such as bayonets can be polished back to the pewter of the casting: in fact, I scrape the detail back to bare metal on all steel mounted muskets. Blue uniforms were dyed with Indigo, which gives a very deep purpleish blue. Add red to dark blue to create a true Indigo. Similarly, Russian green informs tended to be rather dark and blueish, because they were double-dyed with weld and indigo. British rank & file wore brick red uniforms. The Officers wore scarlet, a much brighter shade Yellow is a very difficult pigment, since it rarely covers well. Use yellow ochre first, which is very opaque, then overpaint in a true yellow. Trying to create a dirty campaign appearance is not a good idea with small figures: they just disappear!

Brushes: Since acrylic will eventually destroy any brush, there’s no point in buying expensive sables. I use Prolene nylon, which keep a good point, which is what matters. Use the largest brush possible for each job, with a good point to allow accuracy. Remember to rinse out the brush root every few minutes while you work, and it will last longer. There is no solvent for acrylic once set, so the only way to keep a brush in good shape is not to let the paint dry in it. Use an old large tile as a palette: you can wash it off in warm soapy water. Use daylight bulbs in an anglepoise lamp, and take care of your eyes, and get glasses when you need them.
cathlene
10/14/2016 17:08:28
Maintain the excellent work and producing in the group! http://tinyurl.com/jjl3tn9
Nic Robson
04/26/2015 15:57:09
<p>We haven’t had your problem with Humbrol, but can suggest using Revell white as a substitute. Thank you for commenting</p>
glenn robinson
04/08/2015 23:22:04
Excellent advice but a question. Is your Humbrol 34 Matt White, MATT any more? Mine comes out like a satin sheen despite any shaking or stirring. Doesn't take acrylics well, hence I am intrigued as to why yours isn't as bad as mine for you to promote it. Used it since '72 without problems until the last few years, now I struggle to get past the problem.